Contents
使用k8s部署nginx文件服务器
基础部署
参考: …
参考: https://juejin.cn/post/6846687586434416654
参考:https://www.cnblogs.com/minseo/p/17972672
创建单独的命名空间 , 设为当前操作默认命名空间.
kubectl create ns book
kubectl config set-context --current --namespace book
先简单配置一下 deploy,service,ingress
root@wangjm-B550M-K-1:~/k8s/ns/book# cat nginx.yaml
---
##部署应用nginx
apiVersion: apps/v1
kind: Deployment
metadata:
  name: nginx
  labels:
    name: nginx
spec:
  replicas: 2
  selector:
    matchLabels:
      name: nginx
  template:
    metadata:
      labels:
       name: nginx
    spec:
      containers:
      - name: nginx
        image: docker.io/nginx
        ports:
        - containerPort: 80
---
##创建service
apiVersion: v1
kind: Service
metadata:
  name: nginx
  labels:
    name: nginx
spec:
  #type: NodePort
  ports:
  - port: 80
    protocol: TCP
    targetPort: 80
    name: http
    #nodePort: 30080
  selector:
    name: nginx
---
## 创建ingress
apiVersion: networking.k8s.io/v1
kind: Ingress
metadata:
  name: nginx
  annotations:
    nginx.ingress.kubernetes.io/rewrite-target: /
spec:
  ingressClassName: nginx
  rules:
  - host: book.ole12138.cn
    http:
      paths:
      - path: /
        pathType: Prefix
        backend:
          service:
            name: nginx
            port:
              number: 80
注意到,这里只配置了nginx的html目录到外部pv (由pvc动态分配pv),
对于nginx的配置文件, 并没有作映射.
先试一下, 确认pod都起来了, 服务通了:
root@wangjm-B550M-K-1:~/k8s/ns/book# kubectl get all
NAME                         READY   STATUS    RESTARTS   AGE
pod/nginx-548f96687f-rvrvr   1/1     Running   0          7m44s
pod/nginx-548f96687f-tqs7z   1/1     Running   0          7m44s

NAME            TYPE        CLUSTER-IP      EXTERNAL-IP   PORT(S)   AGE
service/nginx   ClusterIP   172.31.14.218   <none>        80/TCP    7m44s

NAME                    READY   UP-TO-DATE   AVAILABLE   AGE
deployment.apps/nginx   2/2     2            2           7m44s

NAME                               DESIRED   CURRENT   READY   AGE
replicaset.apps/nginx-548f96687f   2         2         2       7m44s


root@wangjm-B550M-K-1:~# curl --resolve book.ole12138.cn:80:192.168.1.100  http://book.ole12138.cn
<!DOCTYPE html>
<html>
<head>
<title>Welcome to nginx!</title>
<style>
html { color-scheme: light dark; }
body { width: 35em; margin: 0 auto;
font-family: Tahoma, Verdana, Arial, sans-serif; }
</style>
</head>
<body>
<h1>Welcome to nginx!</h1>
<p>If you see this page, the nginx web server is successfully installed and
working. Further configuration is required.</p>

<p>For online documentation and support please refer to
<a href="http://nginx.org/">nginx.org</a>.<br/>
Commercial support is available at
<a href="http://nginx.com/">nginx.com</a>.</p>

<p><em>Thank you for using nginx.</em></p>
</body>
</html>
注意到,这里没有配置卷的映射
对于nginx的html目录(数据目录)没有映射到外部pv,
对于nginx的配置文件, 也并没有作映射.
映射数据目录
增加pvc的配置, 并在deployment中添加相应卷的映射.
(这里没有列出文件所有内容, 比如service,ingress的配置, 没有改动,不再赘述)
root@wangjm-B550M-K-1:~/k8s/ns/book# cat nginx.yaml
---
##创建pvc
kind: PersistentVolumeClaim
apiVersion: v1
metadata:
  name: nginx-cephfs-pvc
  labels:
    pvc: cephfs
spec:
  accessModes:
    - ReadWriteMany
  resources:
    requests:
      storage: 10Gi
  storageClassName: csi-cephfs-sc
---
##部署应用nginx
apiVersion: apps/v1
kind: Deployment
metadata:
  name: nginx
  labels:
    name: nginx
spec:
  replicas: 2
  selector:
    matchLabels:
      name: nginx
  template:
    metadata:
      labels:
       name: nginx
    spec:
      containers:
      - name: nginx
        image: docker.io/nginx
        volumeMounts:
        - mountPath: /usr/share/nginx/html
          name: nginx-data
        ports:
        - containerPort: 80
      volumes:
      - name: nginx-data
        persistentVolumeClaim:
          claimName: nginx-cephfs-pvc
注意到,这里只配置了nginx的html目录到外部pv (由pvc动态分配pv),
对于nginx的配置文件, 并没有作映射.
先试一下, 确认pod都起来了, pvc已bound到pv, 服务通了:
root@wangjm-B550M-K-1:~/k8s/ns/book# kubectl get all
NAME                         READY   STATUS    RESTARTS   AGE
pod/nginx-548f96687f-rvrvr   1/1     Running   0          7m44s
pod/nginx-548f96687f-tqs7z   1/1     Running   0          7m44s

NAME            TYPE        CLUSTER-IP      EXTERNAL-IP   PORT(S)   AGE
service/nginx   ClusterIP   172.31.14.218   <none>        80/TCP    7m44s

NAME                    READY   UP-TO-DATE   AVAILABLE   AGE
deployment.apps/nginx   2/2     2            2           7m44s

NAME                               DESIRED   CURRENT   READY   AGE
replicaset.apps/nginx-548f96687f   2         2         2       7m44s


root@wangjm-B550M-K-1:~/k8s/ns/book# kubectl get pvc
NAME               STATUS   VOLUME                                     CAPACITY   ACCESS MODES   STORAGECLASS    VOLUMEATTRIBUTESCLASS   AGE
nginx-cephfs-pvc   Bound    pvc-9bdb9d96-0f9f-4921-bd85-8d39a147ed92   10Gi       RWX            csi-cephfs-sc   <unset>                 6m54s


root@wangjm-B550M-K-1:~/k8s/ns/book# curl --resolve book.ole12138.cn:80:192.168.1.100  http://book.ole12138.cn
<html>
<head><title>403 Forbidden</title></head>
<body>
<center><h1>403 Forbidden</h1></center>
<hr><center>nginx/1.25.5</center>
</body>
</html>
注意到访问ingress的输出变了, 提示403(实际上是没有内容造成的).
这是因为向容器中挂载外部卷的时候, 原来目录下的内容被覆盖(隐藏)了.
映射配置文件
关于nginx的配置文件和默认数据目录
# 主配置文件
/etc/nginx/nginx.conf

# 默认http相关配置文件目录
/etc/nginx/conf.d

# 默认页面文件根路径
/usr/share/nginx/html前面我们已经将/usr/share/nginx/html映射到了pv中. 然后也注意到, 容器中这个文件夹下的文件, 由于外部卷的挂载, 已经被覆盖(隐藏)掉了.
我们需要一份nginx的默认配置.所以需要将容器中的默认配置复制出来.
参考: https://blog.csdn.net/cainiaojan/article/details/106003188
root@wangjm-B550M-K-1:~/k8s/ns/book/etc/nginx# kubectl get pods
NAME                     READY   STATUS    RESTARTS   AGE
nginx-548f96687f-rvrvr   1/1     Running   0          5h25m
nginx-548f96687f-tqs7z   1/1     Running   0          5h25m


root@wangjm-B550M-K-1:~/k8s/ns/book/etc/nginx# kubectl cp nginx-548f96687f-rvrvr:/etc/nginx ./
tar: Removing leading `/' from member names
warning: skipping symlink: "modules" -> "/usr/lib/nginx/modules" (consider using "kubectl exec -n "" "nginx-548f96687f-rvrvr" -- tar cf - "/etc/nginx" | tar xf -")


root@wangjm-B550M-K-1:~/k8s/ns/book/etc/nginx# ls
conf.d  fastcgi_params  mime.types  nginx.conf  scgi_params  uwsgi_params


root@wangjm-B550M-K-1:~/k8s/ns/book/etc/nginx# ls conf.d/
default.conf
root@wangjm-B550M-K-1:~/k8s/ns/book/etc/nginx# cat conf.d/default.conf
server {
    listen       80;
    listen  [::]:80;
    server_name  localhost;

    #access_log  /var/log/nginx/host.access.log  main;

    location / {
        root   /usr/share/nginx/html;
        index  index.html index.htm;
    }

    #error_page  404              /404.html;

    # redirect server error pages to the static page /50x.html
    #
    error_page   500 502 503 504  /50x.html;
    location = /50x.html {
        root   /usr/share/nginx/html;
    }

    # proxy the PHP scripts to Apache listening on 127.0.0.1:80
    #
    #location ~ \.php$ {
    #    proxy_pass   http://127.0.0.1;
    #}

    # pass the PHP scripts to FastCGI server listening on 127.0.0.1:9000
    #
    #location ~ \.php$ {
    #    root           html;
    #    fastcgi_pass   127.0.0.1:9000;
    #    fastcgi_index  index.php;
    #    fastcgi_param  SCRIPT_FILENAME  /scripts$fastcgi_script_name;
    #    include        fastcgi_params;
    #}

    # deny access to .htaccess files, if Apache's document root
    # concurs with nginx's one
    #
    #location ~ /\.ht {
    #    deny  all;
    #}
}
我们以这里的conf.d和nginx.conf为模板 替换为configmap或者外部pv.
结果发现还是configmap比较方便
root@wangjm-B550M-K-1:~/k8s/ns/book/etc/nginx# kubectl create configmap nginx-http-cm --from-file=./conf.d/default.conf
configmap/nginx-http-cm created
root@wangjm-B550M-K-1:~/k8s/ns/book/etc/nginx# kubectl get configmap nginx-http-cm -o yaml
apiVersion: v1
data:
  default.conf: |+
    server {
        listen       80;
        listen  [::]:80;
        server_name  localhost;

        #access_log  /var/log/nginx/host.access.log  main;

        location / {
            root   /usr/share/nginx/html;
            index  index.html index.htm;
        }

        #error_page  404              /404.html;

        # redirect server error pages to the static page /50x.html
        #
        error_page   500 502 503 504  /50x.html;
        location = /50x.html {
            root   /usr/share/nginx/html;
        }

        # proxy the PHP scripts to Apache listening on 127.0.0.1:80
        #
        #location ~ \.php$ {
        #    proxy_pass   http://127.0.0.1;
        #}

        # pass the PHP scripts to FastCGI server listening on 127.0.0.1:9000
        #
        #location ~ \.php$ {
        #    root           html;
        #    fastcgi_pass   127.0.0.1:9000;
        #    fastcgi_index  index.php;
        #    fastcgi_param  SCRIPT_FILENAME  /scripts$fastcgi_script_name;
        #    include        fastcgi_params;
        #}

        # deny access to .htaccess files, if Apache's document root
        # concurs with nginx's one
        #
        #location ~ /\.ht {
        #    deny  all;
        #}
    }

kind: ConfigMap
metadata:
  creationTimestamp: "2024-05-15T10:37:35Z"
  name: nginx-http-cm
  namespace: book
  resourceVersion: "2183202"
  uid: 71292916-fac1-408f-9362-1276f7075927
然后是nginx的主配置文件, 也制作成configmap
root@wangjm-B550M-K-1:~/k8s/ns/book/etc/nginx# kubectl create configmap nginx-cm --from-file=./nginx.conf
configmap/nginx-cm created
root@wangjm-B550M-K-1:~/k8s/ns/book/etc/nginx# kubectl get configmap nginx-cm -o yaml
apiVersion: v1
data:
  nginx.conf: |2

    user  nginx;
    worker_processes  auto;

    error_log  /var/log/nginx/error.log notice;
    pid        /var/run/nginx.pid;


    events {
        worker_connections  1024;
    }


    http {
        include       /etc/nginx/mime.types;
        default_type  application/octet-stream;

        log_format  main  '$remote_addr - $remote_user [$time_local] "$request" '
                          '$status $body_bytes_sent "$http_referer" '
                          '"$http_user_agent" "$http_x_forwarded_for"';

        access_log  /var/log/nginx/access.log  main;

        sendfile        on;
        #tcp_nopush     on;

        keepalive_timeout  65;

        #gzip  on;

        include /etc/nginx/conf.d/*.conf;
    }
kind: ConfigMap
metadata:
  creationTimestamp: "2024-05-15T10:53:36Z"
  name: nginx-cm
  namespace: book
  resourceVersion: "2186828"
  uid: f46d9999-a627-46fd-a2b2-5fc0387103bb
再然后,就需要更新前面pod的配置了
参考: https://kubernetes.io/zh-cn/docs/tasks/configure-pod-container/configure-pod-configmap/#add-configmap-data-to-a-volume
---
##部署应用nginx
apiVersion: apps/v1
kind: Deployment
metadata:
  name: nginx
  labels:
    name: nginx
spec:
  replicas: 2
  selector:
    matchLabels:
      name: nginx
  template:
    metadata:
      labels:
       name: nginx
    spec:
      containers:
      - name: nginx
        image: docker.io/nginx
        volumeMounts:
        - mountPath: /usr/share/nginx/html
          name: nginx-data
        # 这里增加了两项配置
        - mountPath: /etc/nginx/conf.d
          name: nginx-http-cm
        - mountPath: /etc/nginx/nginx.conf
          name: nginx-cm
          subPath: nginx.conf
        ports:
        - containerPort: 80
      volumes:
      - name: nginx-data
        persistentVolumeClaim:
          claimName: nginx-cephfs-pvc
      # 这里增加了两项配置
      - name: nginx-http-cm
        configMap:
          name: nginx-http-cm
      - name: nginx-cm
        configMap:
          name: nginx-cm
应用
root@wangjm-B550M-K-1:~/k8s/ns/book# kubectl apply -f ./nginx.yaml
persistentvolumeclaim/nginx-cephfs-pvc unchanged
deployment.apps/nginx configured
service/nginx unchanged
ingress.networking.k8s.io/nginx unchanged
稍等一会儿, 发现deployment已经全部更新,(滚动更新, 最终完全使用新的replicaset)
root@wangjm-B550M-K-1:~/k8s/ns/book# kubectl get all
NAME                         READY   STATUS    RESTARTS   AGE
pod/nginx-84db799f68-c9r2l   1/1     Running   0          49s
pod/nginx-84db799f68-r7zff   1/1     Running   0          67s

NAME            TYPE        CLUSTER-IP      EXTERNAL-IP   PORT(S)   AGE
service/nginx   ClusterIP   172.31.14.218   <none>        80/TCP    6h13m

NAME                    READY   UP-TO-DATE   AVAILABLE   AGE
deployment.apps/nginx   2/2     2            2           6h13m

NAME                               DESIRED   CURRENT   READY   AGE
replicaset.apps/nginx-548f96687f   0         0         0       6h13m
replicaset.apps/nginx-84db799f68   2         2         2       67s
调整配置文件,允许目录浏览
主要是向nginx配置文件的http块或者server块下, 添加一下目录浏览的配置
    autoindex on;# 显示目录
    autoindex_exact_size on;# 显示文件大小
    autoindex_localtime on;# 显示文件时间
    charset utf-8,gbk;#如果包含中文文件夹需要加此配置否则乱码
我习惯操作本地文件
root@wangjm-B550M-K-1:~/k8s/ns/book/etc/nginx# vim conf.d/default.conf

root@wangjm-B550M-K-1:~/k8s/ns/book/etc/nginx# cat conf.d/default.conf
server {
    listen       80;
    listen  [::]:80;
    server_name  localhost;

    autoindex on;# 显示目录
    autoindex_exact_size on;# 显示文件大小
    autoindex_localtime on;# 显示文件时间
    charset utf-8,gbk;#如果包含中文文件夹需要加此配置否则乱码

    #access_log  /var/log/nginx/host.access.log  main;

    location / {
        root   /usr/share/nginx/html;
        index  index.html index.htm;
    }

    #error_page  404              /404.html;

    # redirect server error pages to the static page /50x.html
    #
    error_page   500 502 503 504  /50x.html;
    location = /50x.html {
        root   /usr/share/nginx/html;
    }

    # proxy the PHP scripts to Apache listening on 127.0.0.1:80
    #
    #location ~ \.php$ {
    #    proxy_pass   http://127.0.0.1;
    #}

    # pass the PHP scripts to FastCGI server listening on 127.0.0.1:9000
    #
    #location ~ \.php$ {
    #    root           html;
    #    fastcgi_pass   127.0.0.1:9000;
    #    fastcgi_index  index.php;
    #    fastcgi_param  SCRIPT_FILENAME  /scripts$fastcgi_script_name;
    #    include        fastcgi_params;
    #}

    # deny access to .htaccess files, if Apache's document root
    # concurs with nginx's one
    #
    #location ~ /\.ht {
    #    deny  all;
    #}
}
然后重建configmap
root@wangjm-B550M-K-1:~/k8s/ns/book/etc/nginx# kubectl delete cm nginx-http-cm
configmap "nginx-http-cm" deleted
root@wangjm-B550M-K-1:~/k8s/ns/book/etc/nginx# kubectl create cm nginx-http-cm --from-file=conf.d
configmap/nginx-http-cm created
然后发布新的deployment (重启pod)
参考: https://kubernetes.io/docs/reference/kubectl/generated/kubectl_rollout/
root@wangjm-B550M-K-1:~/k8s/ns/book/etc/nginx# kubectl rollout restart deploy/nginx
deployment.apps/nginx restarted
root@wangjm-B550M-K-1:~/k8s/ns/book/etc/nginx# kubectl get all
NAME                         READY   STATUS    RESTARTS   AGE
pod/nginx-5746679b48-7zpdt   1/1     Running   0          5s
pod/nginx-5746679b48-zl4d6   1/1     Running   0          9s

NAME            TYPE        CLUSTER-IP      EXTERNAL-IP   PORT(S)   AGE
service/nginx   ClusterIP   172.31.14.218   <none>        80/TCP    6h54m

NAME                    READY   UP-TO-DATE   AVAILABLE   AGE
deployment.apps/nginx   2/2     2            2           6h54m

NAME                               DESIRED   CURRENT   READY   AGE
replicaset.apps/nginx-548f96687f   0         0         0       6h54m
replicaset.apps/nginx-5746679b48   2         2         2       9s
replicaset.apps/nginx-58cb94cb49   0         0         0       26m
replicaset.apps/nginx-84db799f68   0         0         0       42m
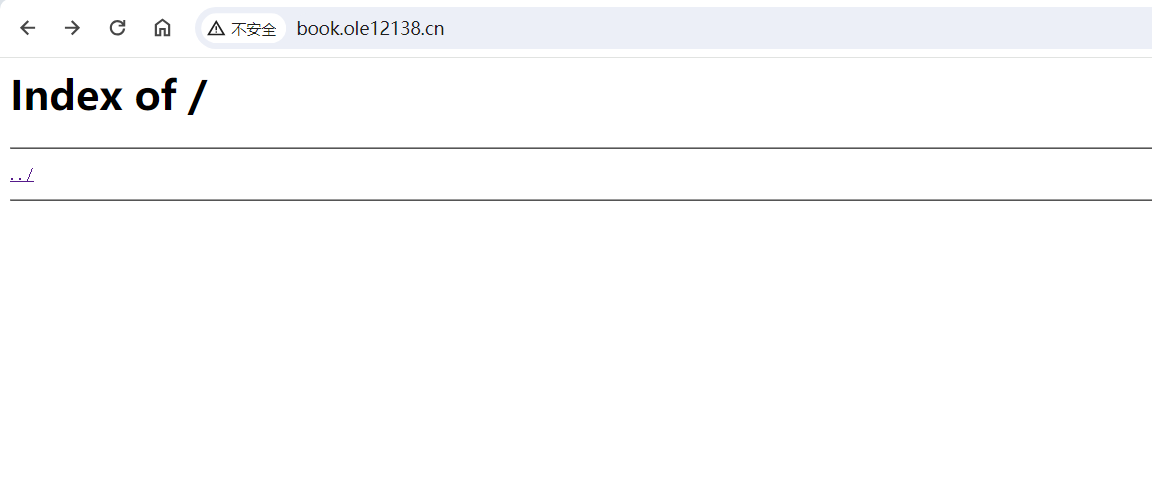
可以看到重启完毕.
然后看到这样的页面, 文件服务器就算是部署完毕了
文件复制: 基于kubectl cp命令
把nginx用作文件服务器,频繁的文件复制必然是少不了的.
kubectl cp命令, 前面映射配置文件的时候, 有过用例, 不再赘述.
文件复制: 主机挂载cephfs
把nginx用作文件服务器,频繁的文件复制必然是少不了的.
cephfs是以文件系统的方式提供的存储, 允许多节点安全挂载. (相对ceph rbd而言).
在内网主机上挂载相同的cephfs卷, 然后复制文件. 必然是一种可行的方式.
查看pv映射到了cephfs的哪里
我们需要查一下,k8s的pvc申请的pv,实际映射到到了cephfs卷的哪里去了.
前面pvc中使用的storageclass是storageClassName: csi-cephfs-sc, 这是通过外部ceph集群提供cephfs文件系统卷的.
对应的卷名, 我也恰好取了cephfs这个名字.
最终, 这里的数据都在ceph的cephfs下的cephfs卷下.
查看数据路径
root@wangjm-B550M-K-1:~/k8s/ns/book# kubectl get pvc
NAME               STATUS   VOLUME                                     CAPACITY   ACCESS MODES   STORAGECLASS    VOLUMEATTRIBUTESCLASS   AGE
nginx-cephfs-pvc   Bound    pvc-9bdb9d96-0f9f-4921-bd85-8d39a147ed92   10Gi       RWX            csi-cephfs-sc   <unset>                 6h18m
root@wangjm-B550M-K-1:~/k8s/ns/book# kubectl describe pvc
Name:          nginx-cephfs-pvc
Namespace:     book
StorageClass:  csi-cephfs-sc
Status:        Bound
Volume:        pvc-9bdb9d96-0f9f-4921-bd85-8d39a147ed92
Labels:        pvc=cephfs
Annotations:   pv.kubernetes.io/bind-completed: yes
               pv.kubernetes.io/bound-by-controller: yes
               volume.beta.kubernetes.io/storage-provisioner: cephfs.csi.ceph.com
               volume.kubernetes.io/storage-provisioner: cephfs.csi.ceph.com
Finalizers:    [kubernetes.io/pvc-protection]
Capacity:      10Gi
Access Modes:  RWX
VolumeMode:    Filesystem
Used By:       nginx-84db799f68-c9r2l
               nginx-84db799f68-r7zff
Events:        <none>
root@wangjm-B550M-K-1:~/k8s/ns/book# kubectl get pv pvc-9bdb9d96-0f9f-4921-bd85-8d39a147ed92
NAME                                       CAPACITY   ACCESS MODES   RECLAIM POLICY   STATUS   CLAIM                   STORAGECLASS    VOLUMEATTRIBUTESCLASS   REASON   AGE
pvc-9bdb9d96-0f9f-4921-bd85-8d39a147ed92   10Gi       RWX            Delete           Bound    book/nginx-cephfs-pvc   csi-cephfs-sc   <unset>                          6h19m
root@wangjm-B550M-K-1:~/k8s/ns/book# kubectl describe pv pvc-9bdb9d96-0f9f-4921-bd85-8d39a147ed92
Name:            pvc-9bdb9d96-0f9f-4921-bd85-8d39a147ed92
Labels:          <none>
Annotations:     pv.kubernetes.io/provisioned-by: cephfs.csi.ceph.com
                 volume.kubernetes.io/provisioner-deletion-secret-name: csi-cephfs-secret
                 volume.kubernetes.io/provisioner-deletion-secret-namespace: ceph-cephfs
Finalizers:      [external-provisioner.volume.kubernetes.io/finalizer kubernetes.io/pv-protection]
StorageClass:    csi-cephfs-sc
Status:          Bound
Claim:           book/nginx-cephfs-pvc
Reclaim Policy:  Delete
Access Modes:    RWX
VolumeMode:      Filesystem
Capacity:        10Gi
Node Affinity:   <none>
Message:
Source:
    Type:              CSI (a Container Storage Interface (CSI) volume source)
    Driver:            cephfs.csi.ceph.com
    FSType:
    VolumeHandle:      0001-0024-92046bac-05dd-11ef-979f-572db13abde1-0000000000000001-8e4310ca-196a-4e16-8995-418ea9da8895
    ReadOnly:          false
    VolumeAttributes:      clusterID=92046bac-05dd-11ef-979f-572db13abde1
                           fsName=cephfs
                           imageFeatures=layering
                           storage.kubernetes.io/csiProvisionerIdentity=1715690930741-6908-cephfs.csi.ceph.com
                           subvolumeName=csi-vol-8e4310ca-196a-4e16-8995-418ea9da8895
                           subvolumePath=/volumes/csi/csi-vol-8e4310ca-196a-4e16-8995-418ea9da8895/a377c168-f91c-4013-a7eb-92aaf5a15f4b
这里最终查到, 数据存在了cephfs卷下的/volumes/csi/csi-vol-8e4310ca-196a-4e16-8995-418ea9da8895/a377c168-f91c-4013-a7eb-92aaf5a15f4b这个目录下.
内网主机挂载cephfs卷
具体参考ceph相关配置的笔记. 这里简略提供一下相应的命令
apt install ceph-common

# 挂载cephfs, 需要确保这个命令存在
which mount.ceph

# 内核级挂载
# 参考: https://docs.ceph.com/en/latest/cephfs/mount-using-kernel-driver/
sudo mkdir /mnt/cephfs
sudo mount -t ceph wangjm@92046bac-05dd-11ef-979f-572db13abde1.cephfs=/ /mnt/cephfs -o mon_addr=192.168.1.8:6789/192.168.1.9:6789/192.168.1.10:6789/192.168.1.1:6789,secret=AQB8R0BmRzHrNBAA4fDPiCkzoVXCgYjpblXzog==

#还有用户级挂载,没试, 略

# 还有windows上cephfs的挂载, 没试, 略
# https://docs.ceph.com/en/latest/cephfs/ceph-dokan/#mount-cephfs-on-windows
https配置
k8s中已经装了 cert-manager的 controller, 配置相应annotation, 和issuer即可.
预发布用的issuer
# cat staging-issuer.yaml
apiVersion: cert-manager.io/v1
kind: Issuer
metadata:
  name: letsencrypt-staging
spec:
  acme:
    # The ACME server URL
    server: https://acme-staging-v02.api.letsencrypt.org/directory
    # Email address used for ACME registration
    email: 784319947@qq.com
    # Name of a secret used to store the ACME account private key
    privateKeySecretRef:
      name: letsencrypt-staging
    # Enable the HTTP-01 challenge provider
    solvers:
      - http01:
          ingress:
            ingressClassName: nginx
生产用的issuer
# cat production-issuer.yaml
apiVersion: cert-manager.io/v1
kind: Issuer
metadata:
  name: letsencrypt-prod
spec:
  acme:
    # The ACME server URL
    server: https://acme-v02.api.letsencrypt.org/directory
    # Email address used for ACME registration
    email: 784319947@qq.com
    # Name of a secret used to store the ACME account private key
    privateKeySecretRef:
      name: letsencrypt-prod
    # Enable the HTTP-01 challenge provider
    solvers:
      - http01:
          ingress:
            ingressClassName: nginx
应用
kubectl apply -f staging-issuer.yaml -f production-issuer.yaml 我习惯在本地文件中修改, 然后应用到k8s (这样, 本地会有存档)
(也可以使用 kubectl edit直接在k8s中操作)
编辑nginx.yaml中关于ingress的内容
参考: https://kubernetes.io/zh-cn/docs/concepts/services-networking/ingress/#tls
参考: https://cert-manager.io/docs/usage/ingress/
---
## 创建ingress
apiVersion: networking.k8s.io/v1
kind: Ingress
metadata:
  name: nginx
  annotations:
    nginx.ingress.kubernetes.io/rewrite-target: /
    cert-manager.io/issuer: letsencrypt-prod
spec:
  ingressClassName: nginx
  tls:
  - hosts:
    - book.ole12138.cn
    secretName: book-tls-secret
  rules:
  - host: book.ole12138.cn
    http:
      paths:
      - path: /
        pathType: Prefix
        backend:
          service:
            name: nginx
            port:
              number: 80
需要手动创建tls用到的secret
参考: https://kubernetes.io/zh-cn/docs/concepts/configuration/secret/#opaque-secret
kubectl create secret generic book-tls-secret然后应用
kubectl apply -f nginx.yaml稍等一会儿,发现已经可以了
root@wangjm-B550M-K-1:~/k8s/ns/book# kubectl get certificate,certificaterequest,order,secret
NAME                                          READY   SECRET            AGE
certificate.cert-manager.io/book-tls-secret   True    book-tls-secret   67s

NAME                                                   APPROVED   DENIED   READY   ISSUER             REQUESTOR                                         AGE
certificaterequest.cert-manager.io/book-tls-secret-1   True                True    letsencrypt-prod   system:serviceaccount:cert-manager:cert-manager   67s

NAME                                                      STATE   AGE
order.acme.cert-manager.io/book-tls-secret-1-2362833161   valid   67s

NAME                         TYPE     DATA   AGE
secret/book-tls-secret       Opaque   2      2m16s
secret/letsencrypt-prod      Opaque   1      27m
secret/letsencrypt-staging   Opaque   1      27m


root@wangjm-B550M-K-1:~/k8s/ns/book# kubectl get all,ingress
NAME                         READY   STATUS    RESTARTS   AGE
pod/nginx-5746679b48-7zpdt   1/1     Running   0          80m
pod/nginx-5746679b48-zl4d6   1/1     Running   0          80m

NAME            TYPE        CLUSTER-IP      EXTERNAL-IP   PORT(S)   AGE
service/nginx   ClusterIP   172.31.14.218   <none>        80/TCP    8h

NAME                    READY   UP-TO-DATE   AVAILABLE   AGE
deployment.apps/nginx   2/2     2            2           8h

NAME                               DESIRED   CURRENT   READY   AGE
replicaset.apps/nginx-548f96687f   0         0         0       8h
replicaset.apps/nginx-5746679b48   2         2         2       80m
replicaset.apps/nginx-58cb94cb49   0         0         0       106m
replicaset.apps/nginx-84db799f68   0         0         0       122m

NAME                              CLASS   HOSTS              ADDRESS         PORTS     AGE
ingress.networking.k8s.io/nginx   nginx   book.ole12138.cn   192.168.1.100   80, 443   8h
发表回复